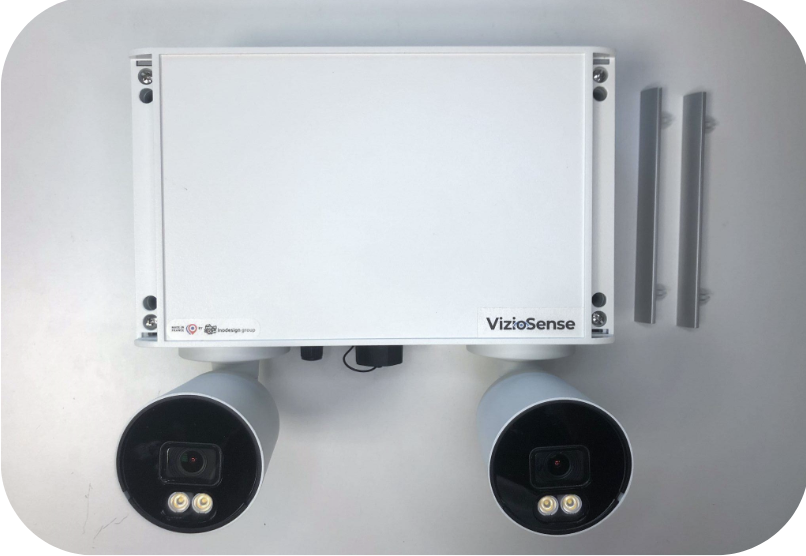
Physical Installation
Wall Installation
- Remove the two covers to access the mounting holes of the casing.
- Insert 4.5mm or 4mm diameter screws (not provided) in the mounting holes and tighten them.
- Once the sensor is installed, replace the covers and ensure the sensor is securely fixed.
Verification
Check that the sensor is securely mounted and stable.
Pole Mount Installation
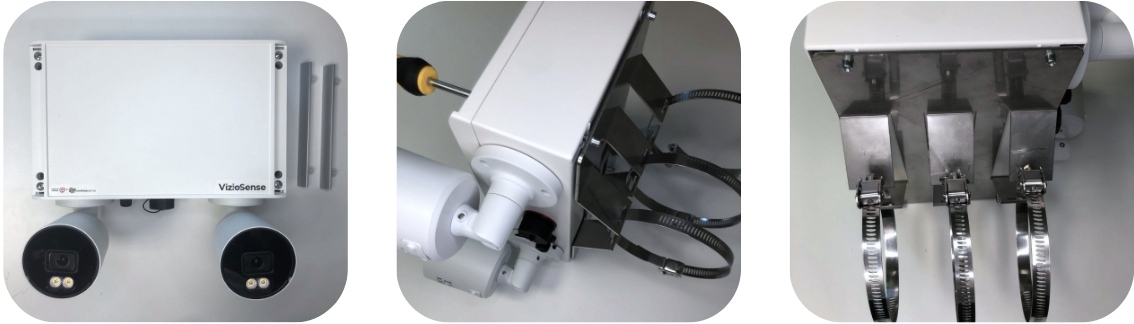
- Remove the two covers to access the mounting holes of the casing.
- Align the fixing holes of the pole mount with the mounting holes of the casing.
- Insert the screws provided with the pole mount into the mounting holes and tighten them.
- Once the pole mount is attached, replace the covers and ensure it is securely fixed.
Verification
Confirm that the pole mount is securely attached and stable.
Camera Configuration
Vertical Setup
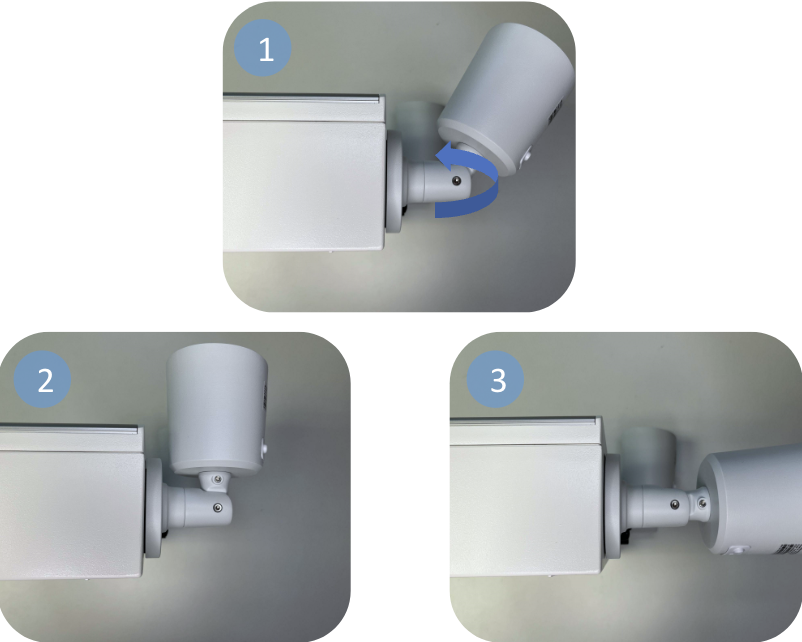
- Turn the screw counterclockwise to loosen it.
- Adjust the camera vertically by moving it up or down.
- Once the vertical angle is set, turn the screw clockwise to tighten it.
Verification
Verify the vertical camera angle by checking the camera feed.
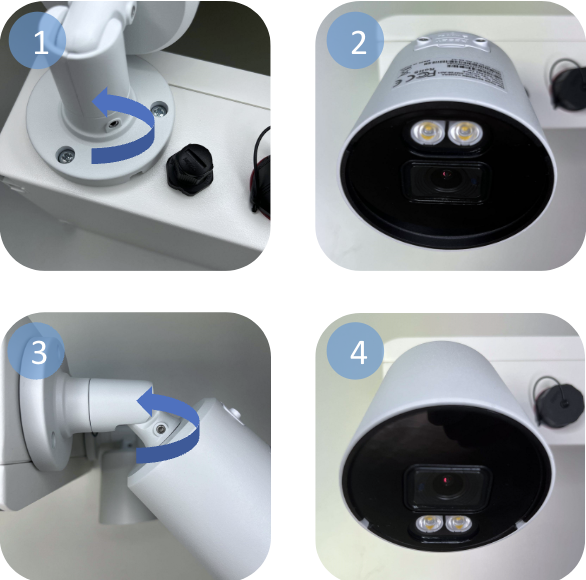
Horizontal Setup
- Loosen the screw at the camera foot by turning it counterclockwise.
- Rotate the camera left or right to adjust the horizontal angle.
- Once the horizontal angle is set, turn the screw clockwise to tighten it.
Verification
Check the horizontal angle by reviewing the camera feed.
Platform Installation
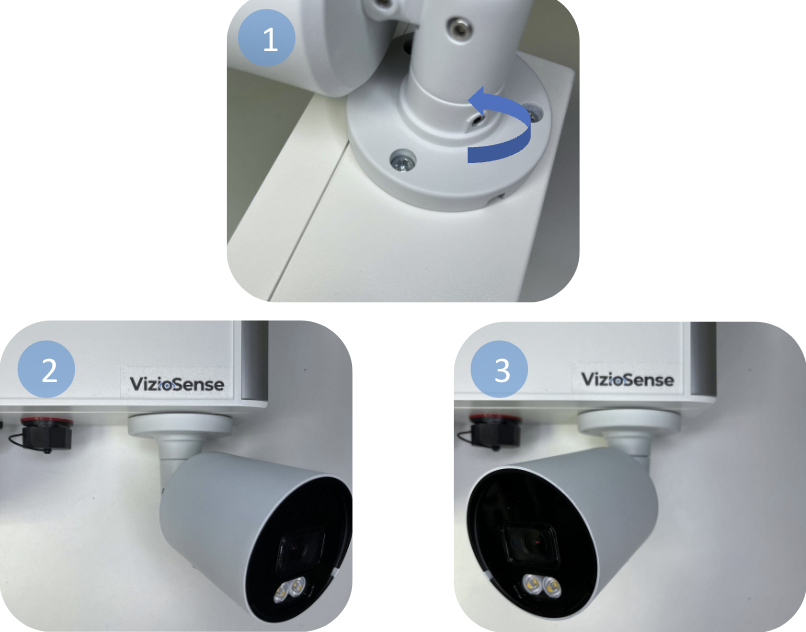
- Loosen the screw at the camera foot by turning it counterclockwise.
- Rotate the camera 180° until it points downward, then tighten the screw.
- Loosen the two screws at the camera head until the head is movable.
- Rotate the camera head 180° and tighten the screws.
Verification
Verify the camera's position and angle by checking the camera feed.