Power Configuration
Make sure to unplug everything before working with power wires.
Your sensor can be powered in 3 different ways:
- Via 230V AC using the 230V power converter
- Via PoE+ (Power over Ethernet IEEE 802.3at)
- Via direct 12V input
230V AC Connection
This step requires the use of our 230V power converter.
Plugging directly into 230V AC will destroy the sensor and void your warranty!
Our camera can be powered using a standard 230V AC power source with our power converter (sold as an accessory).
Please review the converter datasheet for details on current and voltage ratings before installation.
230V Connector Assembly
Ensure all equipment is unplugged before starting with power connections.
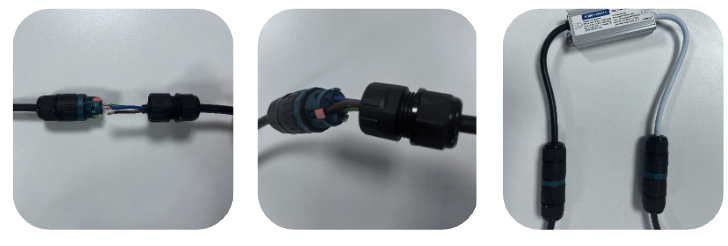
- Turn the nut cover and the tube counterclockwise to untighten them.
- Thread the power cable of 230V AC through the nut cover and the tube in turn. Connect the wires to the terminals: Live (Red), Neutral (Blue), and Earth (Yellow).
- Gently tug on the cable to ensure the connection is secure.
- Turn the nut cover and the tube clockwise to tighten them.
Confirm that the external power supply is active and that the kit is receiving power.
Power over Ethernet (PoE+) Connection
Ensure you use a PoE-certified cable and a PoE-certified power supply (either a switch, router, or power injector) to power the sensor. The sensor supports the PoE+ (IEEE 802.3at) standard.
You can leave the other ports unplugged.
More information on PoE+ can be found here.
Ethernet Connector Assembly
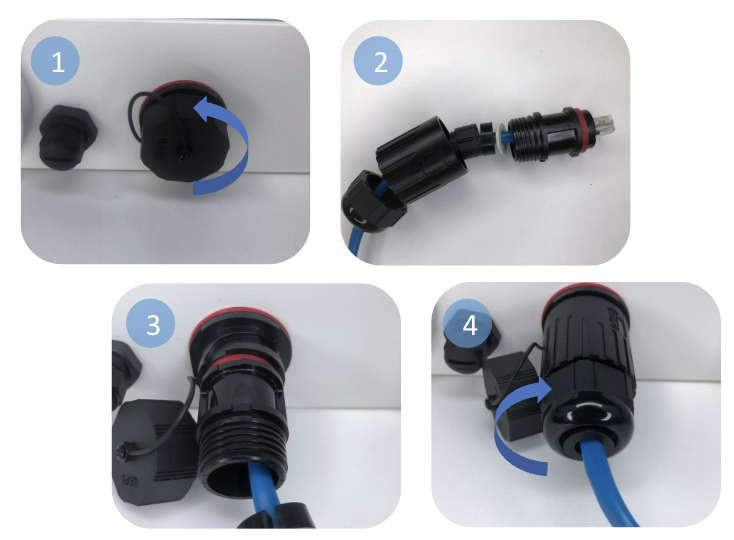
- Unscrew the nut cover from the female RJ45 port by turning it counterclockwise.
- Thread the RJ45 cable through the connector nut cover, seals, and tube.
- Connect the cable to the female RJ45 port. Gently tug on the cable to ensure a secure connection.
- Turn the nut cover and the tube clockwise to tighten them.
12V DC Connection
This step requires the use of our 230V power converter.
Plugging directly into 230V AC will destroy the sensor and void your warranty!
Our camera can also be powered directly from a 12V DC power source, using our battery or your own power source. You will need to assemble the 12V connector yourself.
Please review the sensor datasheet for more information about current and voltage ratings before installation.
Power Up Your Camera
Users using a PoE+ connection do not need to follow these steps.
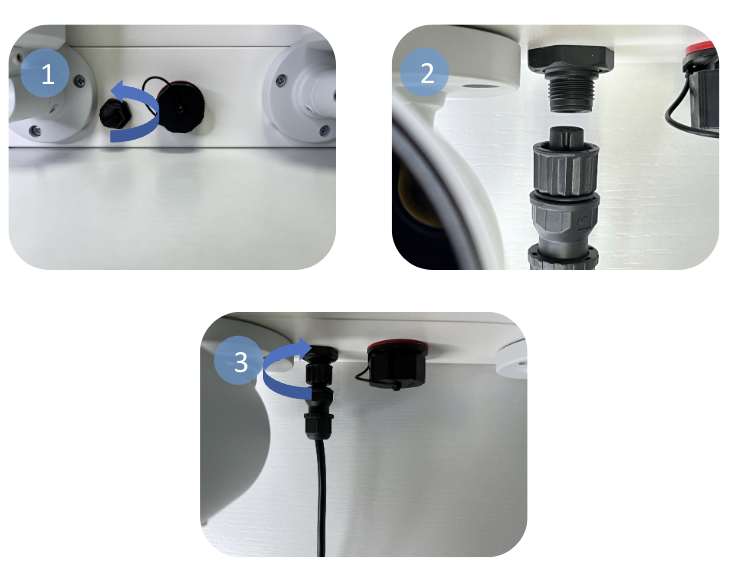
- Unscrew the nut cover from the power port by turning it counterclockwise.
- Connect the connector, ensuring that the groove aligns with the port.
- Tighten the coupling nut of the connector by turning it clockwise.
Ensure that the power is securely connected and that the kit powers on.