GPIO check
This page provides documentation on how to test the GPIO (General-Purpose Input/Output) ports of your camera.
Further updates of this feature will provide automated control of GPIOs based on events (like when an object is detected, or based on a counter value...) or to trigger special actions (i.e., when a button is pressed)
Accessing the GPIO Interface
To access the GPIO controls:
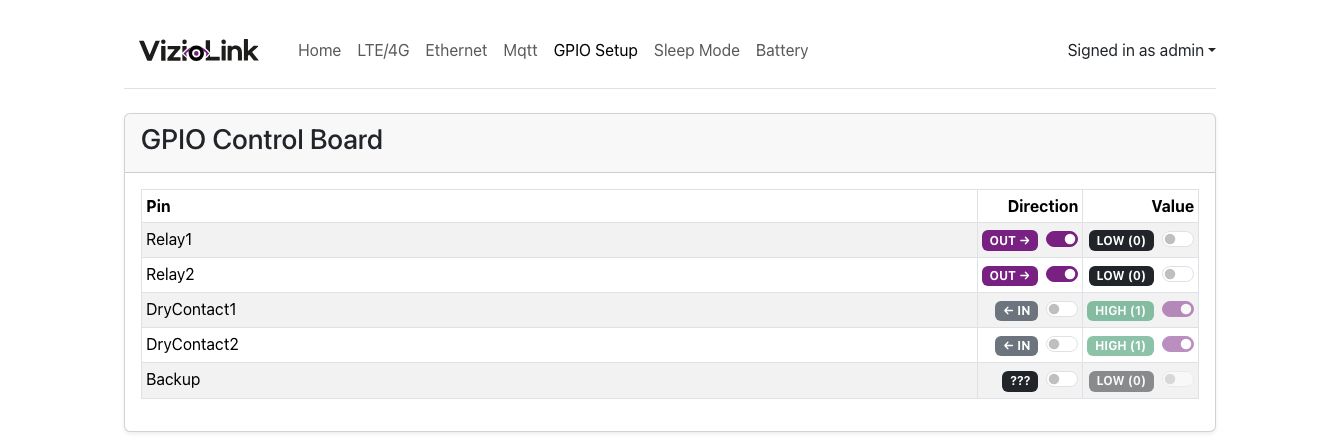
- Navigate to the GPIO section within the camera's interface.
- Review the available GPIO ports and their current status.
Configuring a Hardware Device to a GPIO Pin
When connecting a hardware device to a GPIO pin, you need to follow a few simple steps to ensure it works properly. Whether you're controlling a LED, a sensor, or another device, the process is essentially the same.
Please refer to the datasheet for more details: Datasheet
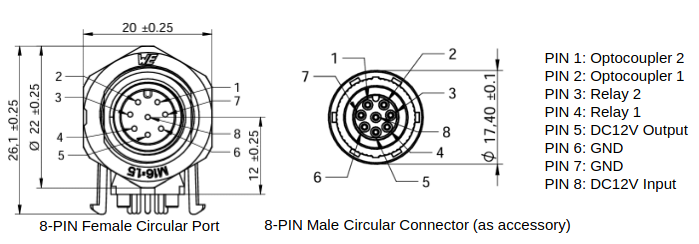
1. Identify the Pin
First, you need to figure out which GPIO pin your device is connected to. Each pin on your board is numbered, so refer to the pinout diagram to locate the correct pin.
2. Set the Pin Mode
Each GPIO pin can be used in different modes:
- Input: Used to read data from the connected component (like a button or sensor).
- Output: Used to send signals to the device (like turning a LED on or off).
Make sure you set the correct mode for the component you are using.
3. Configure the Device
Once the pin is set up, you'll need to tell your system whether the component is an input or output. For example, if you’re using a sensor or button, you’ll configure the pin as an input. If you're controlling something like an LED or relay, you’ll configure the pin as an output.
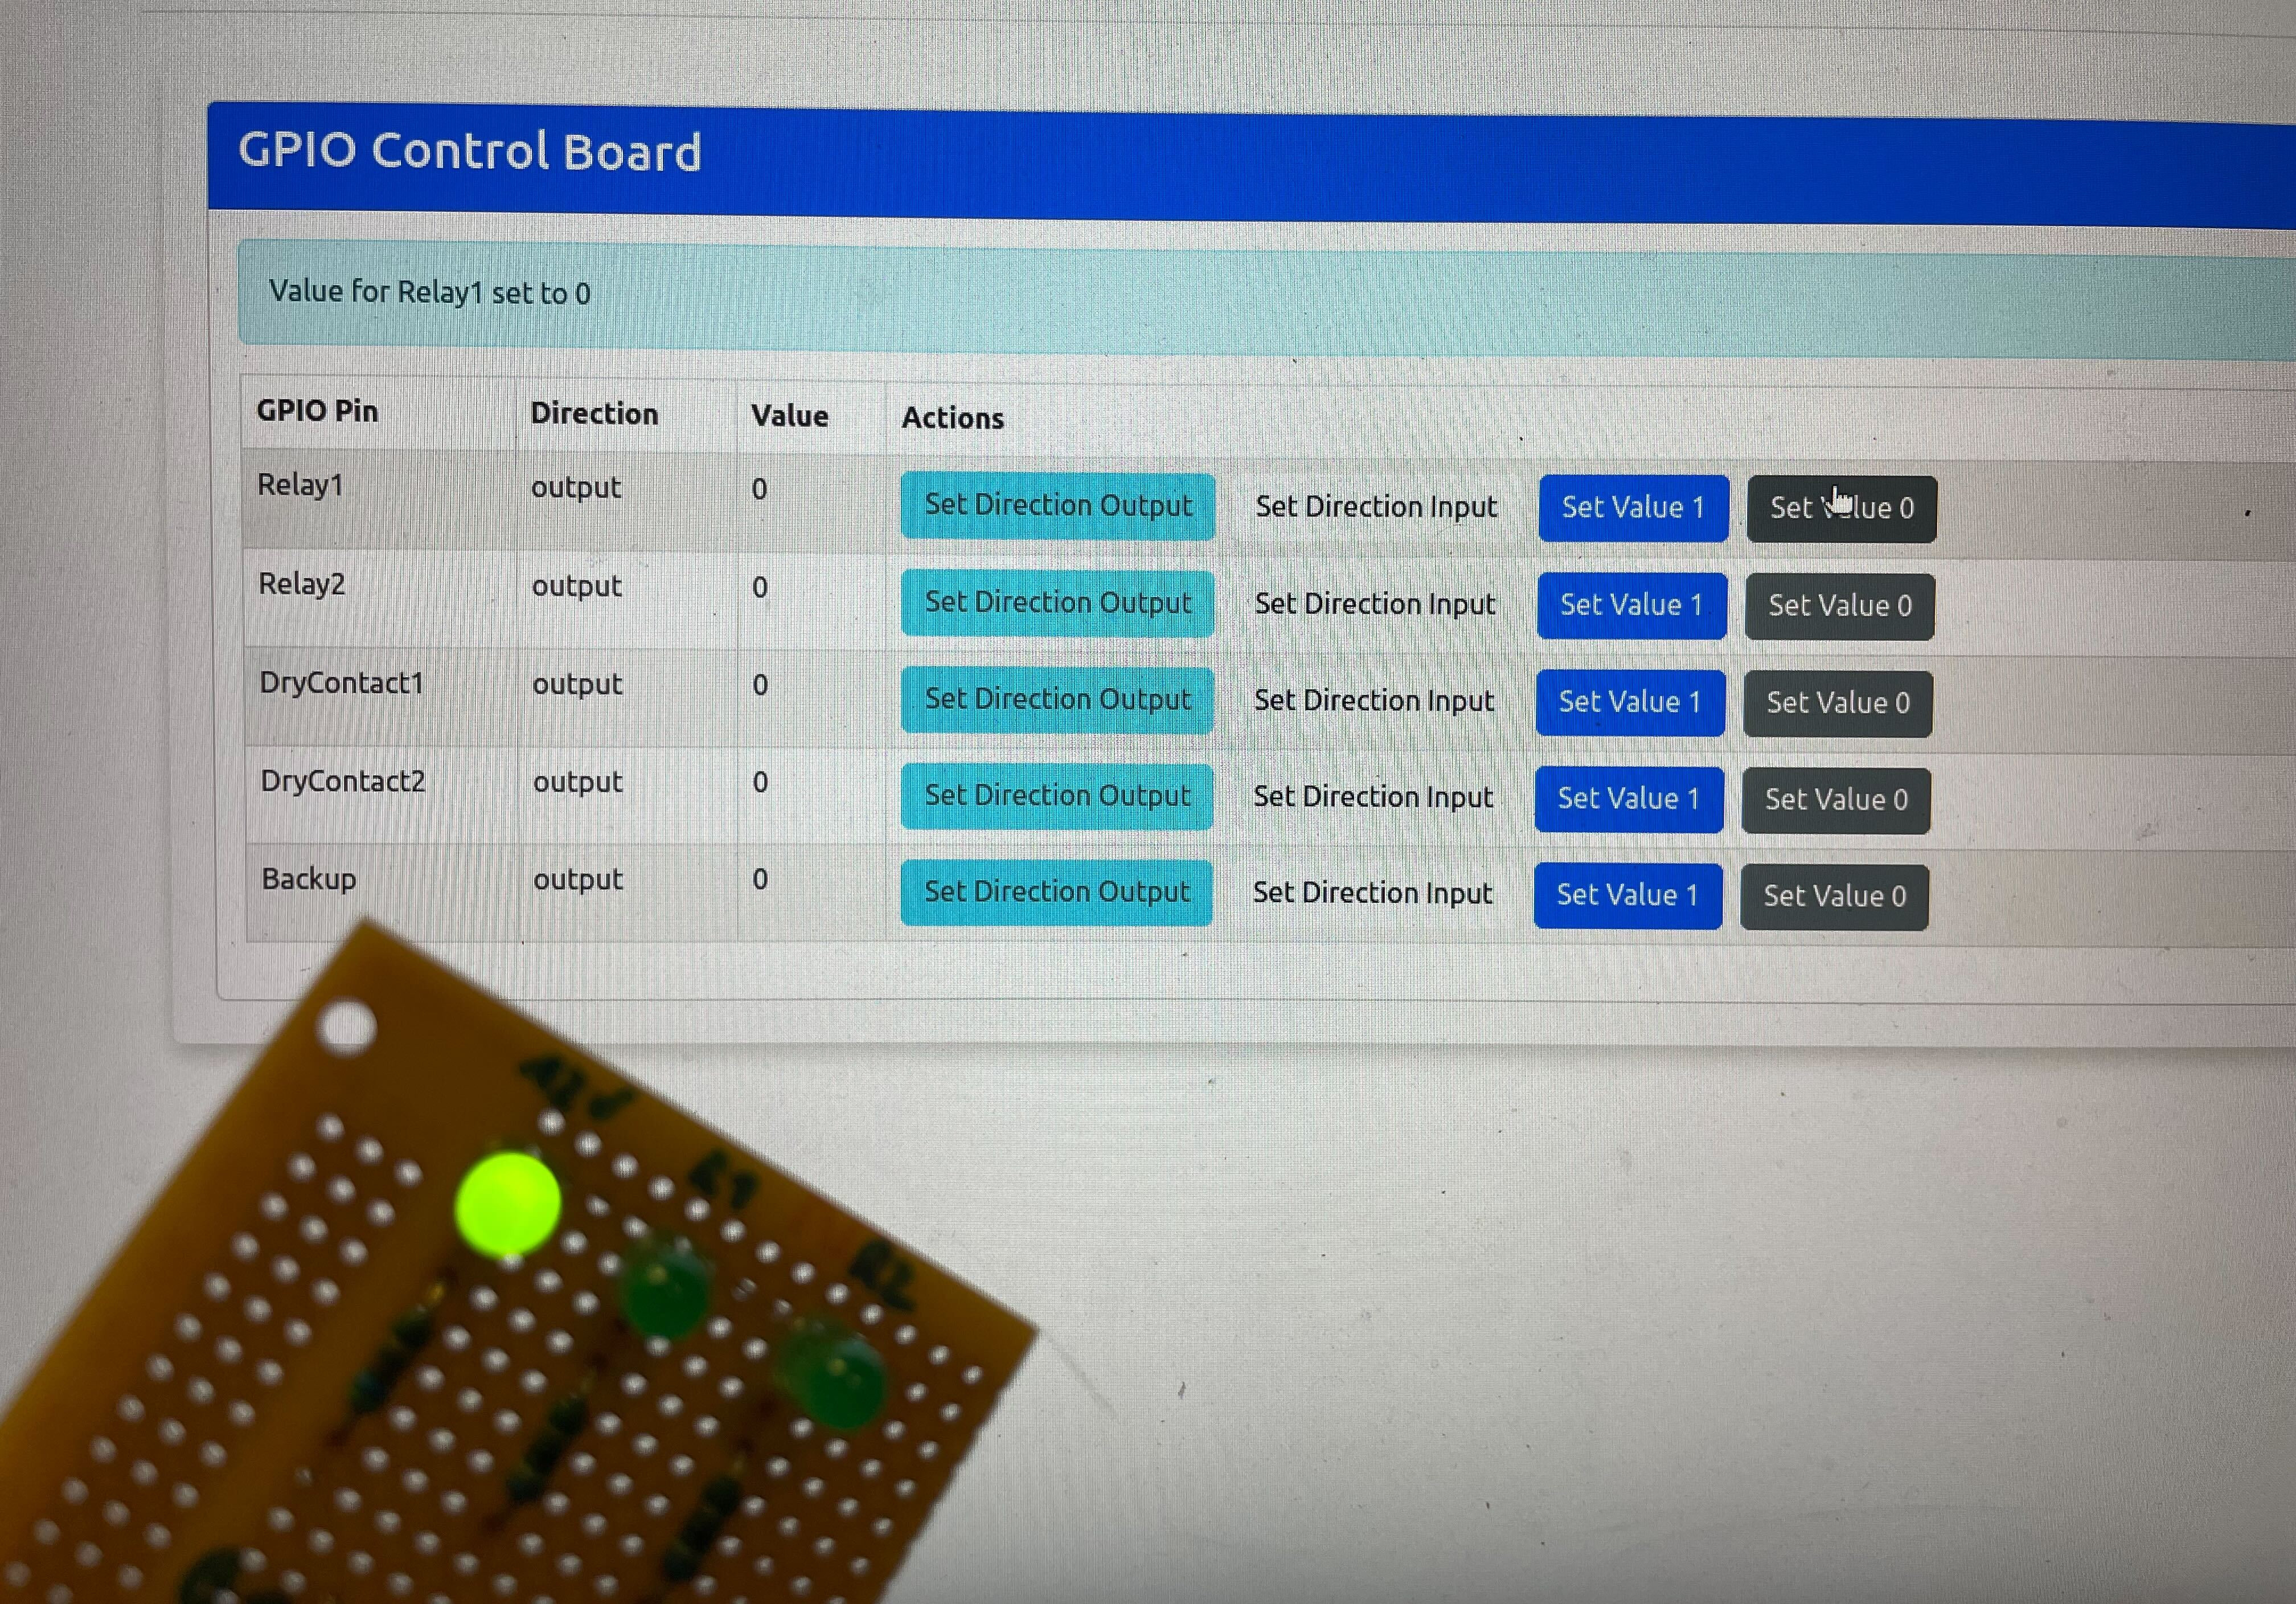
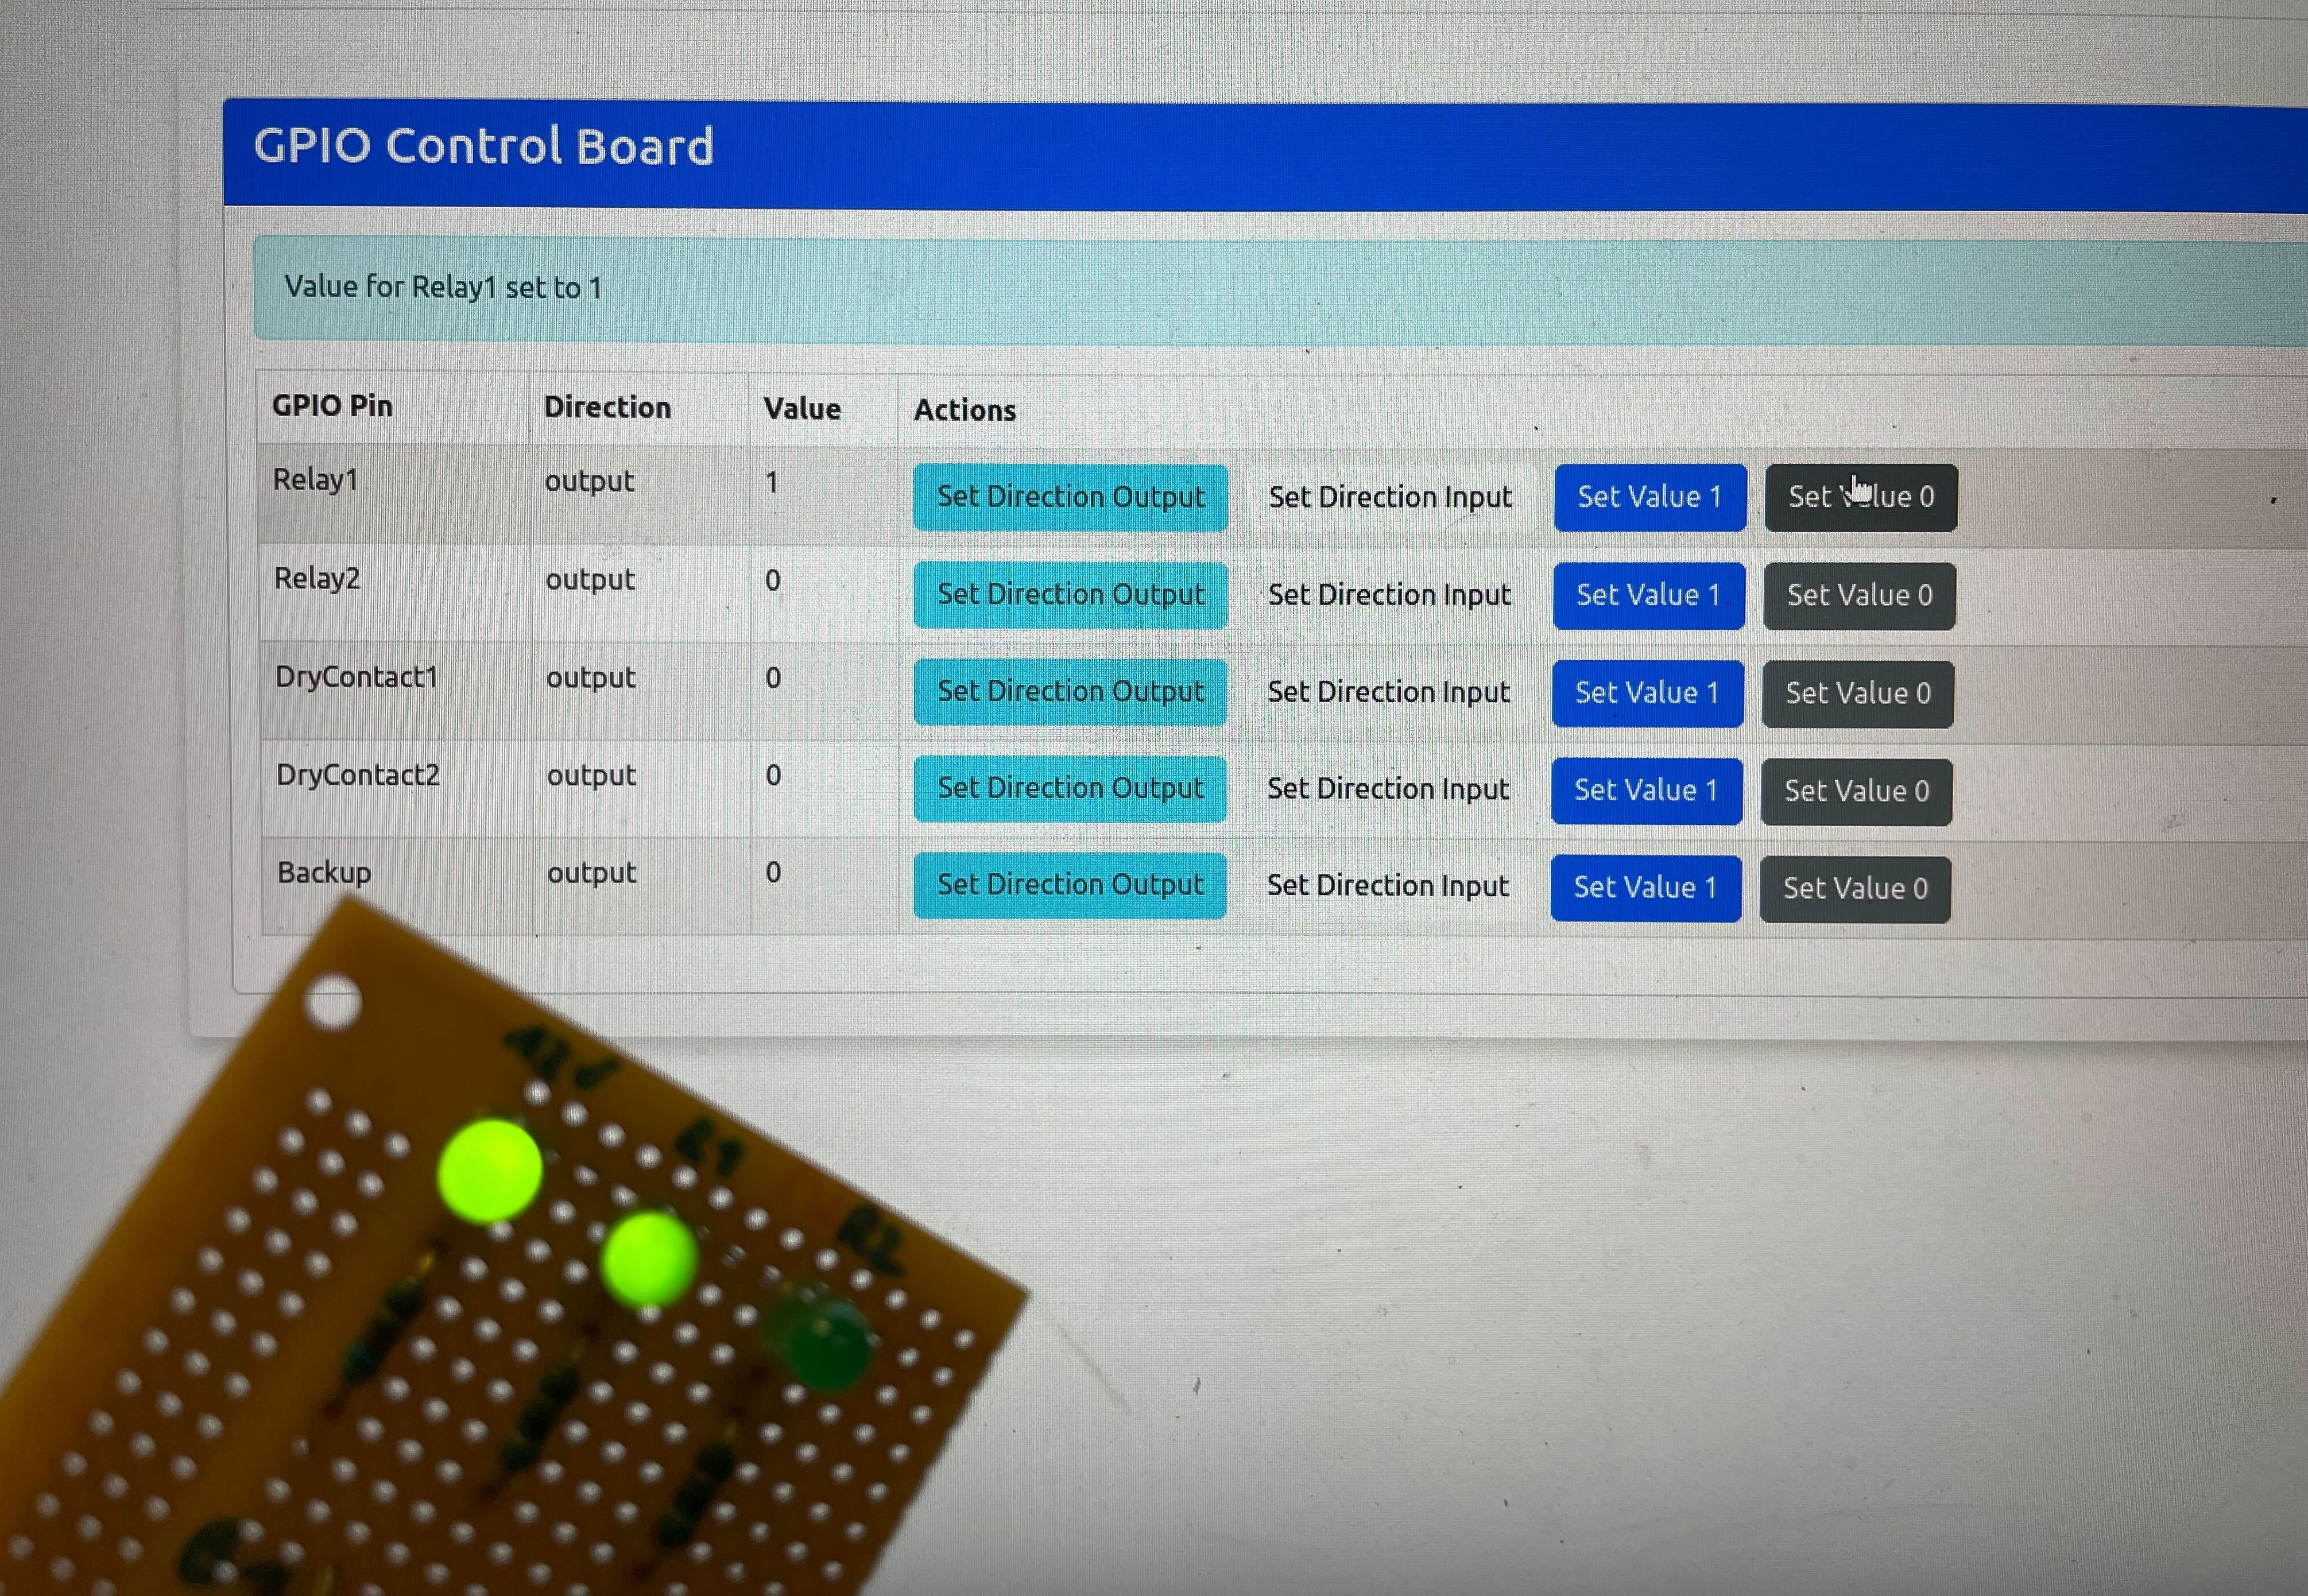
4. Control the Device
Once configured, you can test the device:
- For input components, the system can detect changes or read the data from the component (e.g., pressing a button).
- For output components, you can turn them on or off by sending signals (e.g., lighting up an LED).
Troubleshooting Tips
- Check connections: Make sure the hardware is properly connected to the right pin.
- Verify settings: Double-check that the pin mode (input or output) is set correctly for your device.
- Use pull-up/down resistors: Some devices (like buttons) may need resistors to work properly, so make sure those are in place if necessary.
That's it! You've now configured your device to a GPIO pin and can control it with ease.
Troubleshooting GPIO
If you encounter issues:
- Check if the GPIO port is enabled in the camera settings.
- Ensure any connected devices are properly wired.
Support
If you need more help with GPIO configuration, contact our support team at support@viziosense.com.