MQTT Integration
This guide helps you set up and manage MQTT broker connections and message publishing/subscription for your device.
Navigation
Use the left sidebar to navigate through the different sections of the Local Web UI.
- Settings - For setting up MQTT connection parameters to your own MQTT broker.
- Test bench - For testing the local (device) MQTT broker connection and publishing/subscription to topics.
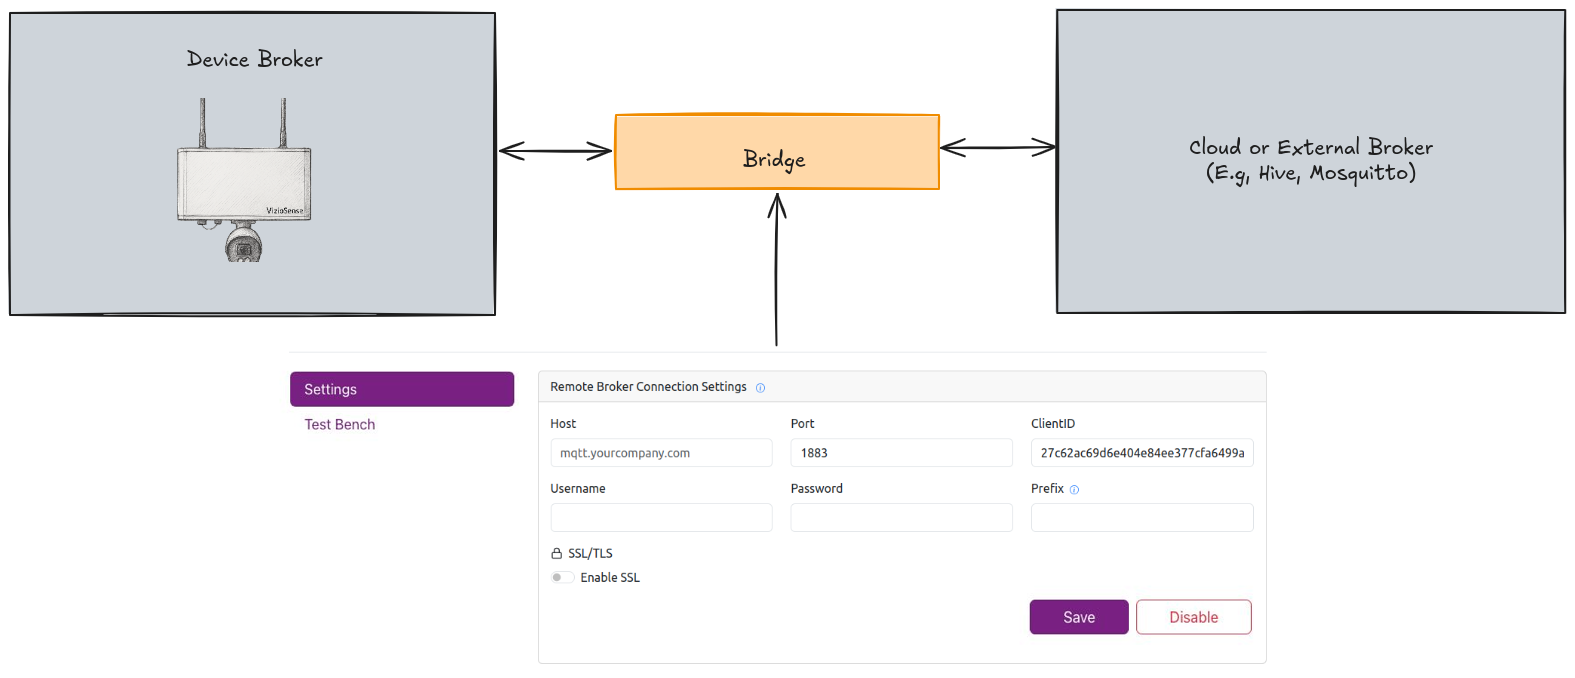
Remote MQTT Broker (Bridge Setup)
 Location:
 Settings tab
This section configures a bridge connection between the VizioSense device and your own external MQTT broker. Once configured, the device will automatically route all its MQTT traffic (publishes and subscriptions) through the remote broker you specify. This allows integration with your own backend, analytics platform, or IoT control center.
To set up the bridge:
- Host: Enter your external broker address (e.g.,
mqtt.yourcompany.com). - Port: Enter the port number your broker listens on. Use
1883for plain TCP,8883for SSL. - Username / Password: Credentials for your broker (if required).
- Client ID: A unique ID used by this device to identify itself.
- Topic Prefix: Optional topic prefix for namespacing (e.g.,
vizio/device1/). - SSL/TLS:
- Toggle Enable SSL if using a secure connection.
- Choose between:
- Server Certificate - If your broker provided a trusted cert.
- Self-Signed Certificate - Upload your own CA, cert and key files
Click Save to apply the settings. The device will now bridge to your broker.
📡 Once saved, the device will start forwarding MQTT data to your broker automatically in the background – no need to keep the UI open.
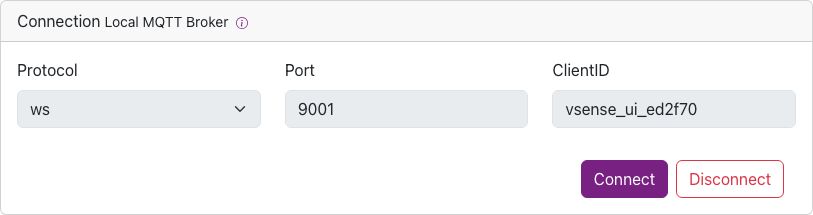
Connecting to MQTT Broker
Local MQTT Broker
Location: Test Bench tab
- Protocol: Set to
ws(Websocket). - Port: Default is
9001. - Client ID: A unique ID for this device UI.
- Click Connect to initiate connection.
- Click Disconnect to terminate.
Subscribing to Topics
Location: Test Bench > Subscriber section
- Topic: Choose one of the listed topics, check out the full documentation
- QoS: Choose Quality of Service level (0, 1, or 2).
- Click Subscribe to start receiving messages.
- Click Unsubscribe to stop receiving messages.
All incoming messages will be displayed in the Receiver section.

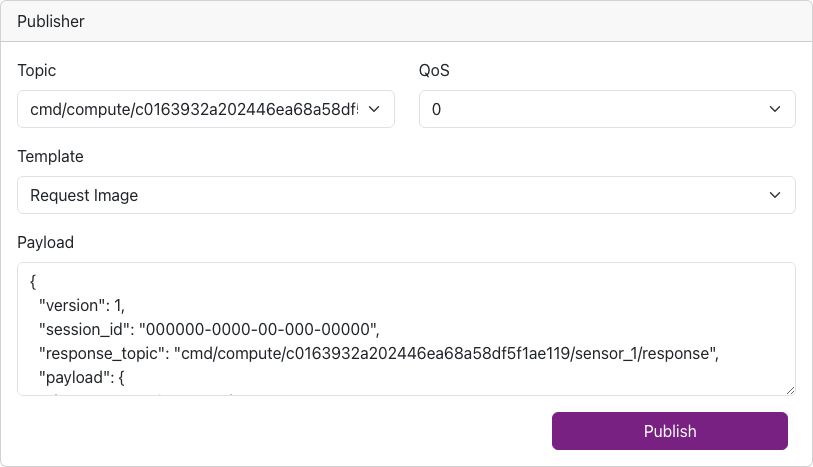
Publishing Messages
Location: Test Bench > Publisher section
- Topic: Choose one of the listed topics, check out the full documentation
- QoS: Choose Quality of Service level (0, 1, or 2).
- Template: Choose from predefined templates or check out the documentation (e.g.,
Request Image) - Payload: JSON body of the message content to be published. Example
{
  "version": 1,
  "session_id": "000000-0000-00-000-00000",
  "response_topic": "cmd/compute/{device_id}/sensor_1/response",
  "payload": {
    ...
  }
}
Templates auto-fill common message formats to save time.
Additional Information
The configurations made in the Settings section are more than just connection parameters. They set up an MQTT bridge between the device and your external broker. This bridge enables:
-
Bi-directional Communication: The device can both publish data to and subscribe to topics from your external broker.
-
Remote Management: Control and monitor your device remotely using your own MQTT infrastructure.
-
Enhanced Security and Flexibility: With options like SSL/TLS, you can secure your data transmission.
Troubleshooting
- Can't connect?
- Double-check the broker host/port.
- Ensure your broker is running and accessible externally.
- No messages showing?
- Verify your subscriptions.
- Ensure payloads are correctly formatted.