Application Configuration
We will guide you through the essential settings required to configure and customize each application. Proper configuration is crucial for successful deployment of our sensors. Please note that after updating the configuration, it may take a short time for the changes to be applied.
VizioPark
These are the essential steps to set up VizioPark for monitoring parking availability in real time.
1. Place parking spots
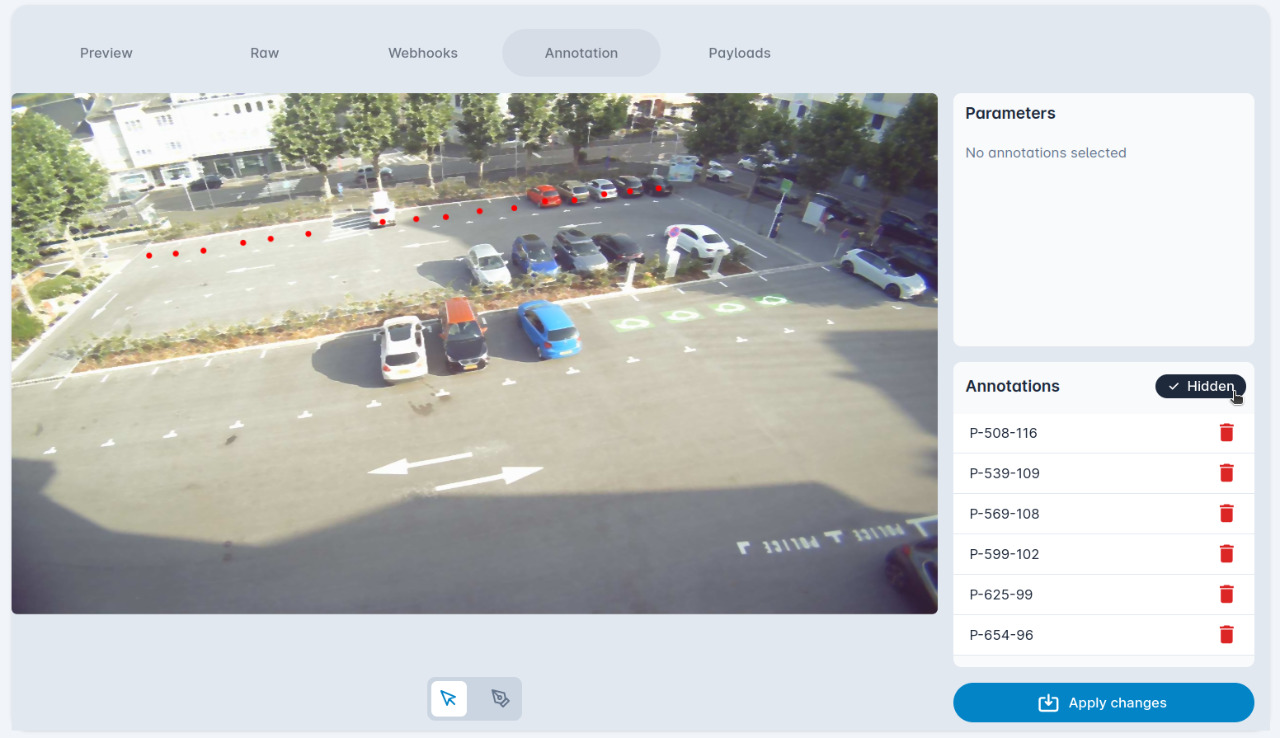
Go to the device page and click on the Annotation Tab.
Annotate each spot by selecting the Parking spot instrument in the Drawing Tools and then clicking on the image to place the spot at the desired position.
2. Specify names
Assign each spot to its corresponding parking zone. You can either edit the spot name in the Annotations table on the right or select the spot and configure its name in the details panel on the right.
3. Apply changes
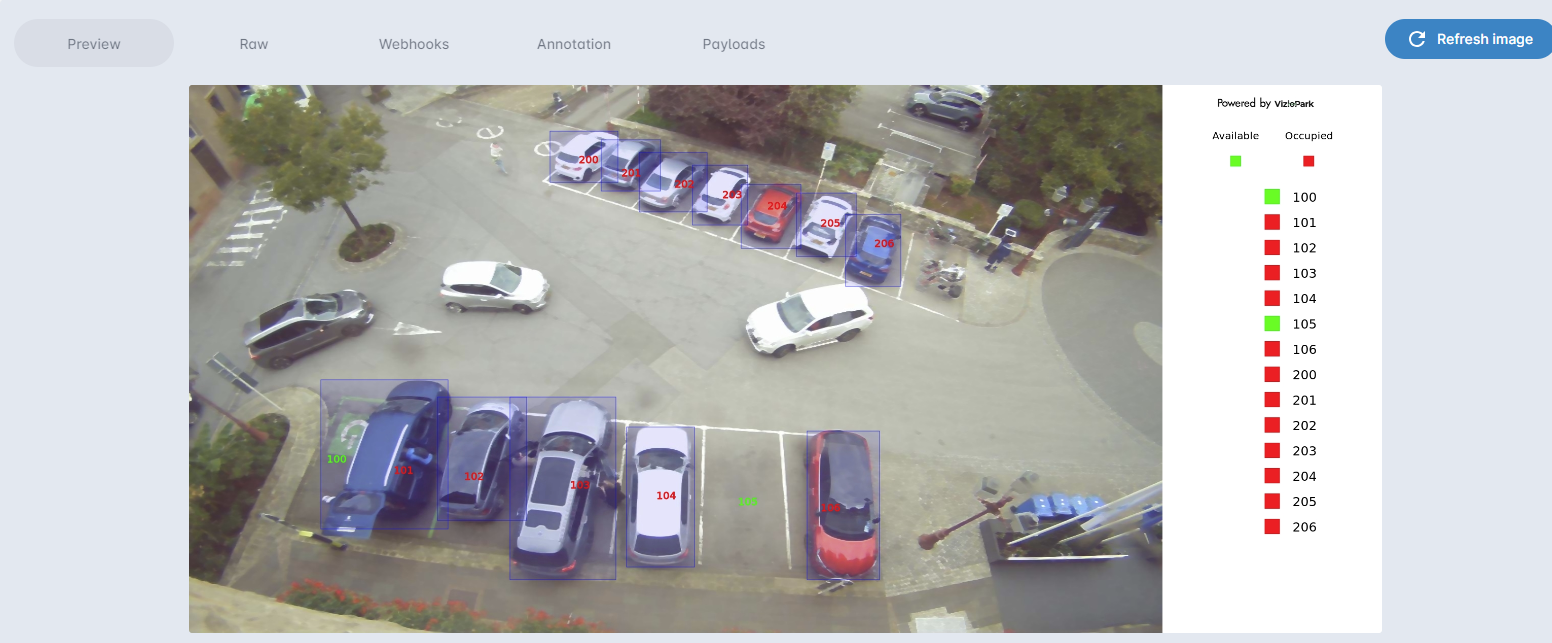
Once the configuration is complete, click on Apply changes and then switch to the Preview Tab. Wait 10 seconds before clicking on Refresh image. The displayed image corresponds to the current status of the parking spots where occupied spots are marked in red and available ones are in green. You can see the status directly in the image with a bounding box around the vehicle that has activated the spot, or on the right Tab using the labels associated with the spots.
Additional instruments
Compare current and last applied versions
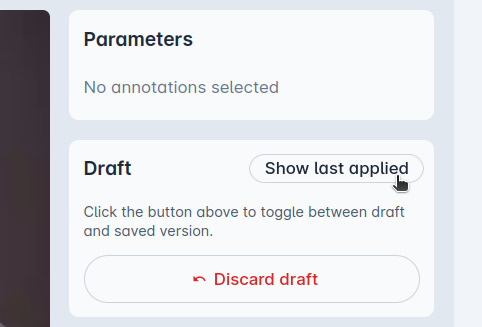
After changes are detected, you can manage the current draft. You can either go back to the last saved version for a short time via Show last applied or delete the draft completely. The configuration is stored locally in your browser until you click on Apply changes or discard the draft.
Hide labels to organize dense parking lots
To simplify management of dense parking lots, you can also use the Hide labels instrument to temporarily remove all textboxes from the view.
Use spot name autocompletion to speed up the process
For best experience, first place all the spots in the desired order and then edit all the names in the table view.
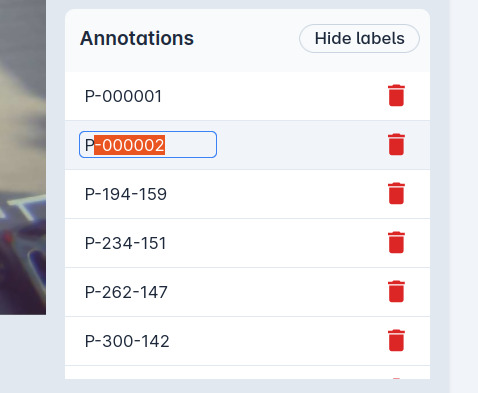
For large parking lots, most of the time names such as '10001', 'P-1' or 'P-000001' are used. After the spots are placed and you type your format into the row input, click Enter to go to the next line editing. If the names are consecutive, you will see suggestions for the next name. To accept, click Enter, Tab or leave it as is. To reject, simply keep typing or click Backspace.
VizioCount
The Zone and Barrier Counting functionality allows you to monitor entries and exits across a barrier/line or count the presence of individuals or objects within a zone. This application provides accurate and real-time data and is configured as follows:
By Zone
In the Annotation Tab, select the Polygon tool at the bottom of the screen. Then draw your polygon on the image to define the zone of interest.
Make sure that the selected zone can contain the full shape of a person or vehicle for accurate counting.
Sometimes placing points precisely on edges is important for accurate zone definition. To do so, you can hold Ctrl and click near the desired edge to add a new vertex. Both the zoomed area and line preview are updated in real-time. Then click on the image to place the new point.
Editing
To modify the polygon if it is not covering the zone that you would like to monitor, you can select it and then drag the vertices to the desired position.
Adding and removing vertices is also possible: hold Ctrl and click near the desired edge to add a new vertex, or click near an existing vertex to remove it. The visual feedback is provided by the plus- or minus-shaped cursor.
| Add a vertex | Remove a vertex |
|---|---|
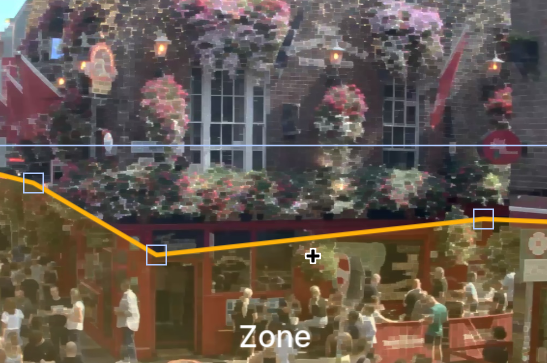 | 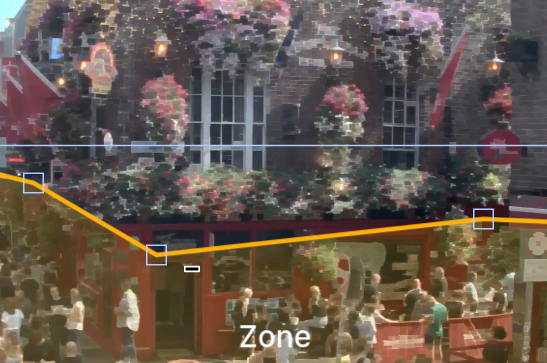 |
Finalizing the configuration
To change the label and the color of the zone, select the annotation. The parameters are displayed in the right panel.
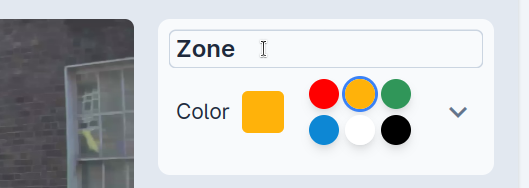
Once the drawing of all your polygons is finished, click on Apply changes.
By Barrier
This application counts objects crossing a virtual line in a specified direction. It's ideal for monitoring entry/exit points, traffic flow, or any linear crossing detection.
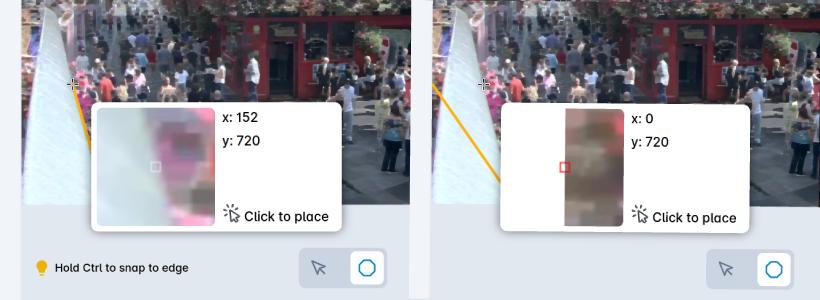
Select the Line tool in the Annotation Tab and then click on the start and end points of the line.
For accurate counting, ensure the entire object is visible before, during, and after crossing the line. Avoid setting up counting lines around turns or curves.
Fine-tuning and adjustment
For precise line placement, hold Ctrl while clicking near edges to snap the line to boundaries or corners.
| Draw Line | Draw Line + Ctrl |
|---|---|
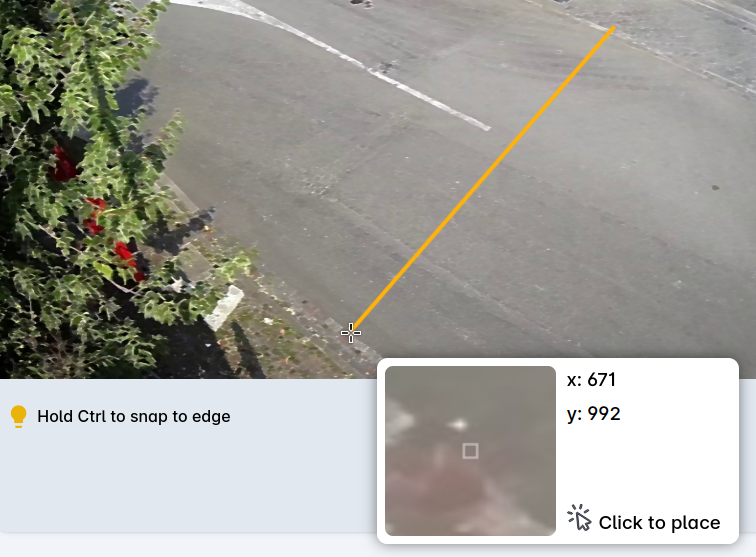 | 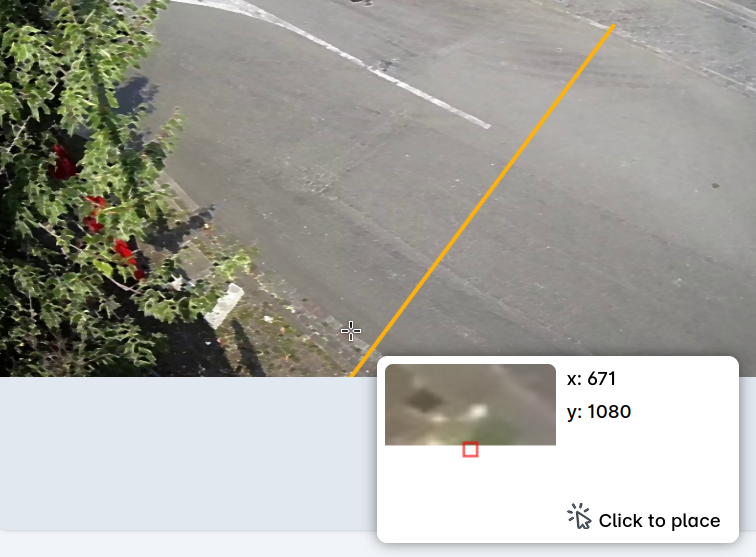 |
To modify the line position, select it by clicking on its label in the right panel, then drag the vertices to the desired location.
For best results, ensure your counting lines are perpendicular to the direction of the objects and positioned where objects will cross them completely. The left image shows a good example of a counting line, while the right one is not.
Configuration options
Select the line by its corresponding label on the right panel to access configuration options. In addition to the name and color parameters, you can also modify:
- Start and end point coordinates: Edit the exact coordinates using up/down arrow keys (+/- 1), or hold Shift for faster increments (+/- 10)
- Classes selector: Define object classes for specific counting requirements. By default, these classes are selected:
person,car,bicycle,motorcycle,bus,truck.
Bidirectional counting
For counting objects crossing the same line in both directions:
- Draw your initial line
- Select the line by its label in the right panel
- Click the
Duplicatebutton - Rename the duplicated line (e.g., "Entry" and "Exit")
- The system will now count crossings in both directions
Finalizing the configuration
Once your configuration is complete, click Apply changes. Switch to the Preview Tab and click Refresh image to see the updated preview with your counting lines.
VizioCrowd
The annotation process for VizioCrowd is similar to VizioCount Zone.
Once the annotation is complete, you can preview the current image that displays the number of headcounts inside the zone.
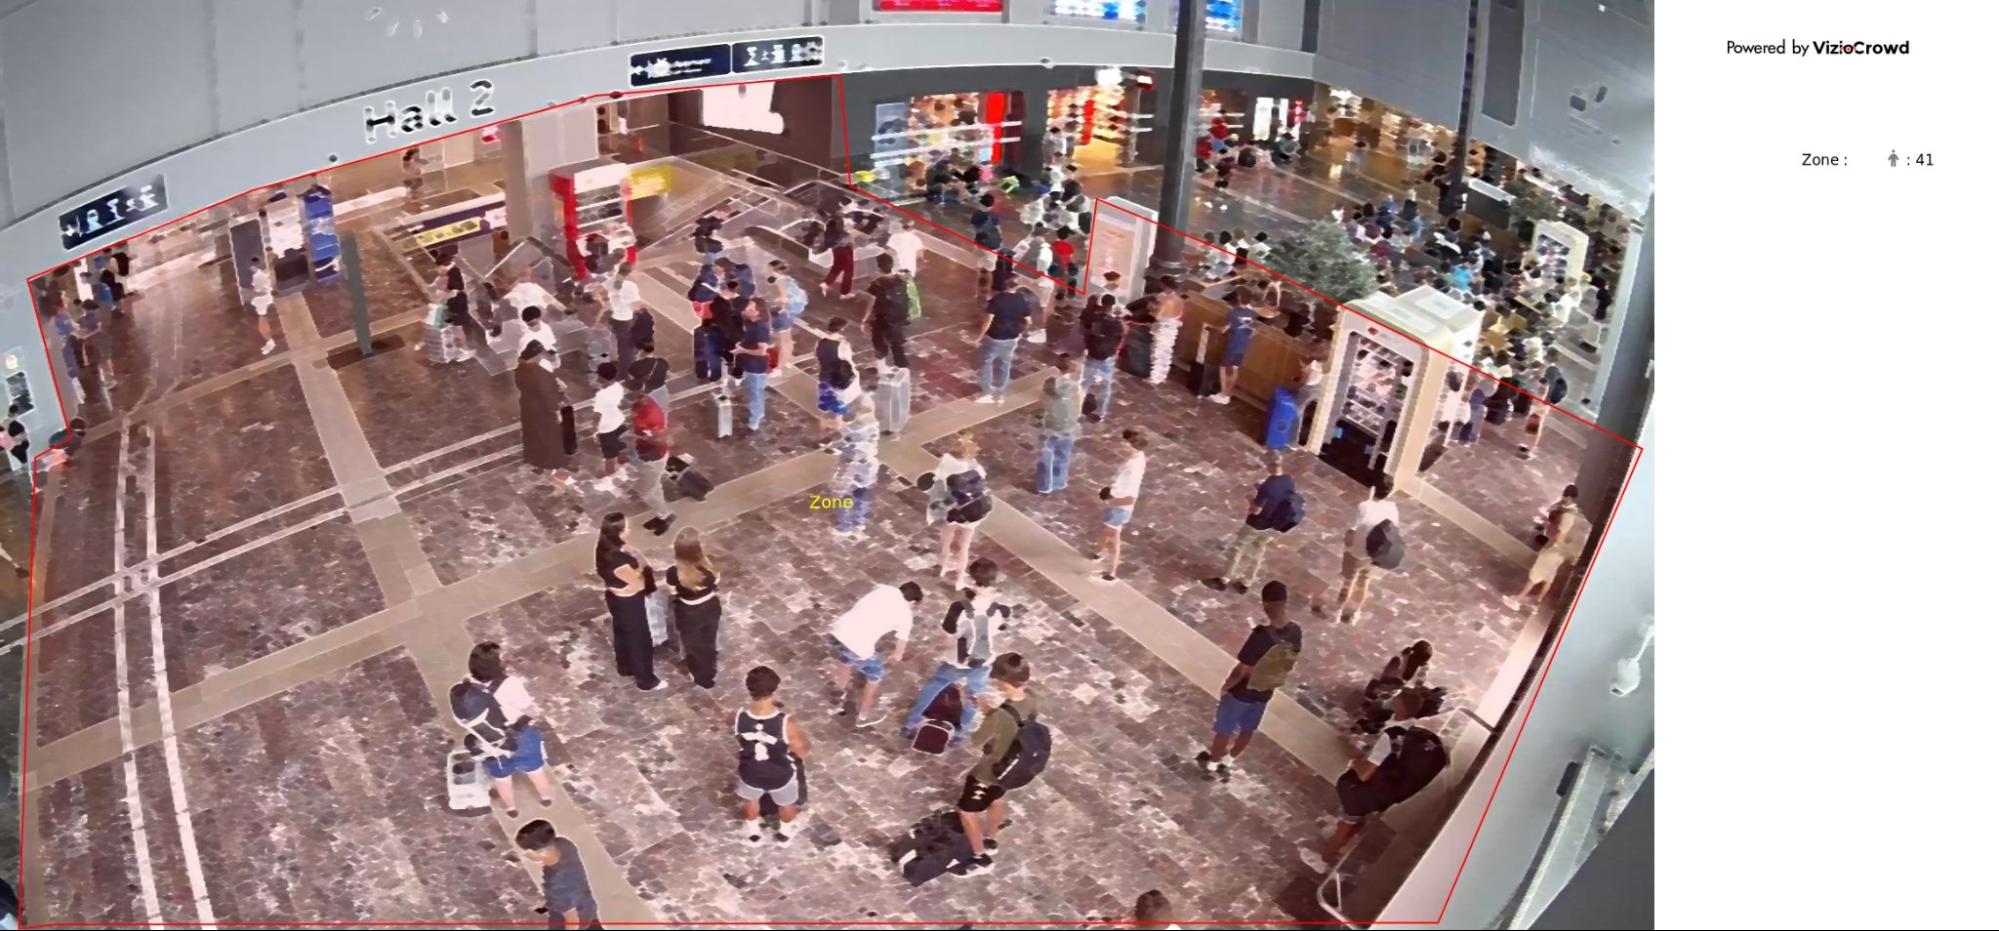
It's important to draw the polygon in an area where the head of a person is fully covered to ensure efficient and accurate counting.